Setting Up an OpenVPN Server on AWS EC2
Preamble
Virtual private networks (VPNs) are common place these days for remote work, online security or even making online services think you live some where else. When it comes to robotics, a VPN can allow you to connect all your devices to each other and to your team. A VPN can facilitate asset management, code deployment, remote support and troubleshooting. While it is not necessary and there are other cloud technologies out there a VPN can be a powerful piece of infrastructure for an early stage robotics as a service (RaaS) startup.
There are many paid services that you could use for your VPN (AWS VPC, Husarnet, Perimeter 81, etc.), and I would advise you to look into them before delving down this rabbit hole. The monthly cost might be worth it for you to not have the overhead of maintenance. However, many teams will look for the reduced cost and added flexibility of managing this themselves. Once operational most of the maintenance work consists of provisioning additional clients and revoking access to existing clients, should a set of credentials become compromised. Both of these tasks are quick to do and can be fairly well automated. Costs for the solution presented here typically run well under $5 per month, depending on traffic. For this tutorial I will use OpenVPN Community Edition as it has good community support and allows for an unlimited number of clients without additional fees, but OpenVPN Access Server or WireGuard might be a better option for you. See here for a comparison of OpenVPN Community Edition and OpenVPN Access Server.
Using This Guide
In other guides I have read on this subject I’ve often found the authors swapping between server and client terminal commands without being particularly explicit in their writing about where to issue the commands. I have tried to remedy that here by starting each command set in one of three ways.
# Local Machine
some bash command
# Server Side
some bash command# Client Side
some bash commandSometimes I also put the output from a command or the partial contents of a text file in a code chunk. If that happens it won’t have the specific leading comments like the above examples. Instead it will just look something like this.
# Some comments in a config file about this directive
this_directive "do this thing"
Hopefully this will help out.
Cloud Compute Setup
Creating an EC2 Instance
To start with we need a server with a static IP address. You could buy some hardware and maintain that yourself on site but I’d recommend using a cloud offering. In this post I’ll be using AWS Elasic Cloud Compute (EC2), but do checkout other platforms, such as Digital Ocean, Linode and Google Compute Engine too.
If this is your first time using AWS then I’d recommend the first thing you should do after logging in as root (just with email and password) is to create a IAM roles for yourself and anyone else who you’ll want to have help you develop and maintain your cloud infrastructure. Then login using an IAM role that you have created for yourself.
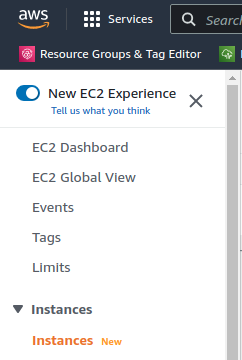
Once you are logged into the AWS Management Console navigate to Services > EC2 then in the sidebar go under Instances and select Instances (figure 1).
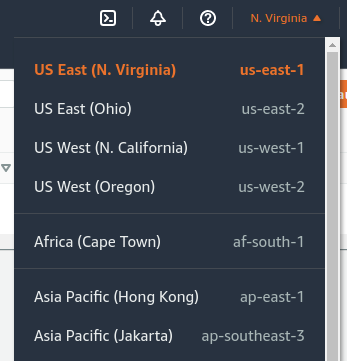
We need to consider which geographic region we want our server to be placed in. Generally the closer the server is to the majority of the clients the better. We can select a region from the available ones in the upper right hand corner of the AWS Management Console. “us-east-1” and “eu-west-1” are common choices for those of us in the West but choose one that suits your situation (figure 2).
Now hit “Launch instances” in the upper right corner to start configuring our server instance (figure 3).

Selecting an AMI
I’m going to use the Ubuntu Server 20.04 LTS (HVM) Amazon Machine Image (AMI) as it is free tier eligible, which will be fine for starting out. Search for “Ubuntu Server 20.04 LTS (HVM)” and hit Select.
Selecting an Instance Type
- Here we’ll use a t2.micro, for the free tier eligibility.
- This can be altered later to give you a more RAM or CPU or network bandwidth as required.
Security Group
- Hit next until you get to the Configure Security Group page.
- Give your security group a suitable name, VPN-sec-group or similar
- You’ll notice that port 22 is open for ssh already.
- We need to add a custom UDP rule over port 1194 for all source IPs (figure 4)
- Hit Review and Launch, followed by Launch.

When prompted to, create a new private key file and download it. Keep this safe we’ll need it to ssh into the server for setup and future maintenance.
You can now view your new running instance in the EC2 instance dashboard. From here I’d suggest you edit the name of your instance to something appropriate, I’ve gone with “test-vpn”. The instance dashboard allows you to view and edit all the options for your instances, monitor their health and start and stop them as required.
Static/ Elastic IP Address
Your instance has been assigned a public IP from Amazon’s available pool for the region you deployed your server in. However, if you take your instance down and restart it for any reason (if it fails for example) then it will be assigned a new public IP from those available. For our VPN server that is no good as it means that our clients won’t know where to connect to. In order to get around this we need to claim a specific IP from Amazon and assign that IP to our server instance.
To do this in the AWS management console, in the side bar for EC2, scroll down to “Network & Security” and choose “Elastic IPs”. Now choose “Allocate Elastic IP address” in the upper right hand corner. Keep the default options and hit “Allocate”.
You should now see your reserved Elastic IP address in the Elastic IP dashboard. Make a note of the address, we’ll need it often later on, for me it was 34.193.47.15. Now select the address and choose “Actions” in the top right corner, then “Associate Elastic IP address”, the resource that we want to associate it to is an instance and you should be able to click on the text box to specify the instance and see your server instance that we created earlier listed as an option. Choose it and click “Associate”.
Now if you return to the instances dashboard you should see your instance’s IP address is the Elastic IP that we just created, you may need to refresh the page to have it update.
Server Side Setup
Connecting Using SSH
In the instance dashboard if you select your server’s instance and choose “Connect” toward the upper right corner of the instance dashboard, then select “ssh client” tab.
Here there will be a guide on how to use the private key that we downloaded earlier to connect to our Ubuntu instance running in the cloud.
The commands will look something like this but with your public IP instead of 34-193-47-15, note the “-” separator, rather than “.” and the path to the access key you downloaded instead of “my.pem”.
# Local Machine
chmod 400 my.pem
ssh -i "my.pem" ubuntu@ec2-34-193-47-15.compute-1.amazonaws.com
You’ll be asked to add the host to the list of known hosts, type yes and hit enter.
We’re in!
Modify the Hostname
You might also want to update the hostname to be something more readable than the default assigned by AWS.
Use the following command to edit the hostname file and change it to something useful, I went for test-vpn again. Note that host names don’t like underscores and they won’t get used if you try to.
# Server Side
sudo nano /etc/hostname
Exit and save with Ctrl+x followed by y and hit enter.
Then reboot the instance for the change to take effect.
# Server Side
sudo reboot
Installing OpenVPN and Easy RSA
We need to download the required software. Easy RSA for generating certificates and keys and OpenVPN for doing the business. We also want net-tools for ease of identifying our IP address and default interface.
# Server Side
sudo apt-get update
sudo apt-get install openvpn easy-rsa net-tools
Configuring the OpenVPN Server
OpenVPN comes with some example files for us to build on, which is great as starting completely from scratch would suck.
# Server Side
cd /usr/share/doc/openvpn/examples/sample-config-files/
We are going to create our server configuration based on the zipped file here, so lets extract it to the OpenVPN program directory.
# Server Side
sudo gunzip -c server.conf.gz > ~/server.conf
sudo cp ~/server.conf /etc/openvpn/server.conf
Let’s get in and take a look at this file.
# Server Side
cd /etc/openvpn/
sudo nano server.conf
It’s full of comments and all the directives in here are well explained.
First off, prefix the ca.crt server.crt server.key and dh.pem with the server directory. You might also need to rename the files appropriately. I’ll be calling my server “server” throughout to keep things simple, you may choose otherwise.
# Any X509 key management system can be used.
# OpenVPN can also use a PKCS #12 formatted key file
# (see "pkcs12" directive in man page).
ca server/ca.crt
cert server/server.crt
key server/server.key  # This file should be kept secret

# Diffie hellman parameters.
# Generate your own with:
#   openssl dhparam -out dh2048.pem 2048
dh server/dh.pem
We want to be sure that all our client’s traffic goes through the OpenVPN server.
Uncomment: push “redirect-gateway def1 bypass-dhcp”
# If enabled, this directive will configure
# all clients to redirect their default
# network gateway through the VPN, causing
# all IP traffic such as web browsing and
# and DNS lookups to go through the VPN
# (The OpenVPN server machine may need to NAT
# or bridge the TUN/TAP interface to the internet
# in order for this to work properly).
push "redirect-gateway def1 bypass-dhcp"
We want client’s DNS requests to use the VPN tunnel, so they can’t be monitored.
Uncomment either one of or both:
push “dhcp-option DNS 208.67.222.222”
push “dhcp-option DNS 208.67.220.220”
You can also optionally edit the DNS to use another provider, I went with Google’s DNS 8.8.8.8.
# Certain Windows-specific network settings
# can be pushed to clients, such as DNS
# or WINS server addresses.  CAVEAT:
# http://openvpn.net/faq.html#dhcpcaveats
# The addresses below refer to the public
# DNS servers provided by opendns.com.
push "dhcp-option DNS 8.8.8.8"
;push "dhcp-option DNS 208.67.220.220"
Let’s have the OpenVPN server run with safe permission levels.
Uncomment:
user nobody
group nogroup
# It's a good idea to reduce the OpenVPN
# daemon's privileges after initialization.
#
# You can uncomment this out on
# non-Windows systems.
user nobody
group nogroup
Exit and save with Ctrl+x followed by y and hit enter.
Packet Forwarding and Firewall
Turn on IP packet forwarding.
# Server Side
sudo nano /proc/sys/net/ipv4/ip_forward
Change the 0 to a 1.
Exit and save with Ctrl+x followed by y and hit enter.
Then enable IP packet forwarding on boot by editing the sysctl.conf.
# Server Side
sudo nano /etc/sysctl.conf
Uncomment: net.ipv4.ip_forward=1
# Uncomment the next line to enable packet forwarding for IPv4
net.ipv4.ip_forward=1
Exit and save with Ctrl+x followed by y and hit enter.
Check that we have the universal firewall (ufw) is installed.
# Server Side
ufw --version
If we see something like this the answer is yes.
ufw 0.36
Copyright 2008-2015 Canonical Ltd.
Let’s see if it is active.
# Server Side
sudo ufw status
Nope.
Status: inactiveOK then, let’s set some rules. These will be the same as what we did in the AWS security group. You could argue that this step with ufw isn’t necessary and that we can just lean on AWS, but it’s quick for me to show here and you may not be using AWS to provide your compute.
# Server Side
sudo ufw allow ssh
sudo ufw allow 1194/udp
# Server Side
sudo nano /etc/default/ufwChange:
DEFAULT_FORWARD_POLICY=“DROP”
to
DEFAULT_FORWARD_POLICY=“ACCEPT”
# Set the default forward policy to ACCEPT, DROP or REJECT.  Please note that
# if you change this you will most likely want to adjust your rules
DEFAULT_FORWARD_POLICY="ACCEPT"
Exit and save with Ctrl+x followed by y and hit enter.
For the next step we need to identify the interface we are using for the internet.
# Server Side
ifconfig
The return should look something like below, we can see the local loop back lo to home (127.0.0.1) and our internet facing interface eth0 on 172.31.86.140.
eth0: flags=4163<UP,BROADCAST,RUNNING,MULTICAST>  mtu 9001
        inet 172.31.86.140  netmask 255.255.240.0  broadcast 172.31.95.255
        inet6 fe80::10e7:f8ff:fe89:49bb  prefixlen 64  scopeid 0x20<link>
        ether 12:e7:f8:89:49:bb  txqueuelen 1000  (Ethernet)
        RX packets 190651  bytes 269842353 (269.8 MB)
        RX errors 0  dropped 0  overruns 0  frame 0
        TX packets 28300  bytes 2598273 (2.5 MB)
        TX errors 0  dropped 0 overruns 0  carrier 0  collisions 0

lo: flags=73<UP,LOOPBACK,RUNNING>  mtu 65536
        inet 127.0.0.1  netmask 255.0.0.0
        inet6 ::1  prefixlen 128  scopeid 0x10<host>
        loop  txqueuelen 1000  (Local Loopback)
        RX packets 282  bytes 26634 (26.6 KB)
        RX errors 0  dropped 0  overruns 0  frame 0
        TX packets 282  bytes 26634 (26.6 KB)
        TX errors 0  dropped 0 overruns 0  carrier 0  collisions 0
Now we need to add that to the ufw before.rules config file.
# Server Side
sudo nano /etc/ufw/before.rules
Add the following somewhere near the top of the file:
*nat
:POSTROUTING ACCEPT [0.0]
-A POSTROUTING -s 10.8.0.0/8 -o eth0 -j MASQUERADE
COMMIT
#
# rules.before
#
# Rules that should be run before the ufw command line added rules. Custom
# rules should be added to one of these chains:
#   ufw-before-input
#   ufw-before-output
#   ufw-before-forward
#

*nat
:POSTROUTING ACCEPT [0.0]
-A POSTROUTING -s 10.8.0.0/8 -o eth0 -j MASQUERADE
COMMIT
Exit and save with Ctrl+x followed by y and hit enter.
Now we can enable ufw.
# Server Side
sudo ufw enable
Proceed with y and hit enter.
Congratulations, if you still have an active ssh session with your remote server you haven’t messed this up…
…maybe.
We can check the status of the firewall and the active rules.
# Server Side
sudo ufw status
Status: active
To Action From
-- ------ ----
22/tcp ALLOW Anywhere
1194/udp ALLOW Anywhere
22/tcp (v6) ALLOW Anywhere (v6)
1194/udp (v6) ALLOW Anywhere (v6) Setting up the Server Side Keys and Certs
We are going to take all the build scripts that installed with Easy RSA and put them into the same directory as OpenVPN for convenience.
# Server Side
sudo cp -r /usr/share/easy-rsa /etc/openvpn
We need to do some setup in the Easy RSA directory. Namely creating a vars file from the provided example. This will store our default values for a range of variables that are asked for when using Easy RSA.
# Server Side
sudo cp /etc/openvpn/easy-rsa/vars.example /etc/openvpn/easy-rsa/vars
sudo nano /etc/openvpn/easy-rsa/vars
Edit Country, Province, City, Org, Email and OU as required.
# Organizational fields (used with 'org' mode and ignored in 'cn_only' mode.)
# These are the default values for fields which will be placed in the
# certificate.  Don't leave any of these fields blank, although interactively
# you may omit any specific field by typing the "." symbol (not valid for
# email.)

set_var EASYRSA_REQ_COUNTRY     "US"
set_var EASYRSA_REQ_PROVINCE    "California"
set_var EASYRSA_REQ_CITY        "San Francisco"
set_var EASYRSA_REQ_ORG         "Copyleft Certificate Co"
set_var EASYRSA_REQ_EMAIL       "me@example.net"
set_var EASYRSA_REQ_OU          "My Organizational Unit"
Exit and save with Ctrl+x followed by y and hit enter.
Now we can generate the all of the required certs and keys for the server.
# Server Side
cd /etc/openvpn/easy-rsa
sudo ./easyrsa clean-all
sudo ./easyrsa init-pki
sudo ./easyrsa build-ca server nopass
I went with the name “server” for my UNIQUE_SERVER_SHORT_NAME, but you can replace as you see fit.
# Server Side
sudo ./easyrsa init-pki
sudo ./easyrsa gen-req UNIQUE_SERVER_SHORT_NAME nopass
I find it easier to keep the UNIQUE_SERVER/CLIENT_SHORT_NAME the same as the UNIQUE_SHORT_FILE_NAME in the following commands, for my example this would be “server”.
# Server Side
sudo ./easyrsa sign-req server UNIQUE_SHORT_FILE_NAME
Type yes and hit enter.
We can now verify our generated certificates.
# Server Side
sudo openssl verify -CAfile pki/ca.crt pki/issued/server.crt
We also need to generate a 2048 bit Diffie-Hellman pem file.
# Server Side
sudo ./easyrsa gen-dh
Next we need to move all these generated files somewhere that OpenVPN can get at them. Note that for me, “server” was my UNIQUE_SHORT_FILE_NAME and the commands shown here reflect that in the filenames but not in the OpenVPN sub-directory.
# Server Side
sudo cp pki/ca.crt /etc/openvpn/server/.
sudo cp pki/issued/server.crt /etc/openvpn/server/.
sudo cp pki/private/server.key /etc/openvpn/server/.
sudo cp pki/dh.pem /etc/openvpn/server/.
We are also going to use TLS for additional security and this means we need an additional key.
# Server Side
cd /etc/openvpn
sudo openvpn --genkey --secret ta.key
Now we can start the server and check it’s status.
# Server Side
service openvpn start
service openvpn status
Looks good.
● openvpn.service - OpenVPN service
     Loaded: loaded (/lib/systemd/system/openvpn.service; enabled; vendor preset: enabled)
     Active: active (exited) since Sat 2022-03-12 13:19:56 UTC; 19min ago
    Process: 555331 ExecStart=/bin/true (code=exited, status=0/SUCCESS)
   Main PID: 555331 (code=exited, status=0/SUCCESS)
For more information and debug we can check the main log file created by the process.
# Server Side
sudo watch tail /var/log/openvpn/openvpn.log
Looks as though we are up and running, now lets provision a client and get connected.
Sat Mar 12 13:19:58 2022 Socket Buffers: R=[212992->212992] S=[212992->212992]
Sat Mar 12 13:19:58 2022 UDPv4 link local (bound): [AF_INET][undef]:1194
Sat Mar 12 13:19:58 2022 UDPv4 link remote: [AF_UNSPEC]
Sat Mar 12 13:19:58 2022 GID set to nogroup
Sat Mar 12 13:19:58 2022 UID set to nobody
Sat Mar 12 13:19:58 2022 MULTI: multi_init called, r=256 v=256
Sat Mar 12 13:19:58 2022 IFCONFIG POOL: base=10.8.0.4 size=62, ipv6=0
Sat Mar 12 13:19:58 2022 IFCONFIG POOL LIST
Sat Mar 12 13:19:58 2022 Initialization Sequence Completed
Generating Client Keys
Clients also need a keys and certificates generating. In the command set below change UNIQUE_CLIENT_SHORT_NAME to the name of your client. For this demonstration I went with “client”.
# Server Side
cd /etc/openvpn/easy-rsa
sudo ./easyrsa init-pki
sudo ./easyrsa gen-req UNIQUE_CLIENT_SHORT_NAME nopass
In the command set below change UNIQUE_SHORT_FILE_NAME to something suitable, I would recommend the name of the client. For this demonstration I went with the same as the UNIQUE_CLIENT_SHORT_NAME, “client”.
# Server Side
sudo ./easyrsa sign-req client UNIQUE_SHORT_FILE_NAME
When prompted type yes and hit enter.
We can now verify our generated and signed certificates using openssl. You may need to change client.crt to match the name of your .crt file.
# Server Side
sudo openssl verify -CAfile pki/ca.crt pki/issued/client.crt
Now we need to pass over these certificates and keys over to OpenVPN.
# Server Side
sudo cp pki/ca.crt /etc/openvpn/client/.
sudo cp pki/issued/client01.crt /etc/openvpn/client/.
sudo cp pki/private/client01.key /etc/openvpn/client/.
Creating the Unified .ovpn Client File
There are different methods of providing all of the required keys and certificates to a client, personally I think the simplest way is to combine them all into one file.
We can use an OpenVPN example file as the basis for our .ovpn file. We’ll copy this example and edit it as a template to re-use for when ever we choose to make subsequent clients.
# Server Side
cp /usr/share/doc/openvpn/examples/sample-config-files/client.conf ~/template.ovpn
The clients will need to know the server’s public IP, we can get the IP from the AWS management console (or from the note I’m sure you made earlier), it’s the Elastic IP that we assigned to our instance. For me it was 34.193.47.15. We need to add this and change some other settings in our template.ovpn file.
# Server Side
cd ~
nano template.ovpn
Find remote and replace my-server-1 with the public IP address of your server. For me this ends up looking like this.
# The hostname/IP and port of the server.
# You can have multiple remote entries
# to load balance between the servers.
remote 34.193.47.15 1194
;remote my-server-2 1194
Remove the leading semi-colon to uncomment out “user nobody” and “group nogroup” to allow operation with downgraded priveleges.
# Downgrade privileges after initialization (non-Windows only)
user nobody
group nogroup
We also need to comment out the directives that point to the ca, cert and key, as we are going to add those to this file.
# SSL/TLS parms.
# See the server config file for more
# description.  It's best to use
# a separate .crt/.key file pair
# for each client.  A single ca
# file can be used for all clients.
;ca ca.crt
;cert client.crt
;key client.key
It’s the same story for the directive that points to the tls-auth key, again we are going to put this key in to this file
# If a tls-auth key is used on the server
# then every client must also have the key.
;tls-auth ta.key 1
Exit and save with Ctrl+x followed by y and hit enter.
Let’s create a directory within our home directory and give it the same name as our client, which for me was “client”. This will be where we store copies of our client’s keys and certificates. You can imagine on a server with over one hundred clients this could get very messy very quickly so taking care when naming clients and creating some system to organise things here will help out later.
Let’s make the directory for this specific client, in our home directory. My client is called “client” so I’ve called my directory client, I’d advise you use whatever your client’s name is here.
# Server Side
mkdir ~/client
Now we need to fill it with all the relevant files for our client to connect. Finally we’ll use the ls command inside the directory and just check that we’ve got everything together.
# Server Side
cd /etc/openvpn/client
sudo cp ca.crt client.crt client.key ~/client
cd ~/client
sudo cp /etc/openvpn/ta.key ~/client
cp ~/template.ovpn ~/client/client.ovpn
ls
Looks like we do.
ca.crt client.crt client.key client.ovpn ta.keyNow we can append each of these other files to our .ovpn file, along with some ML style declarations.
For the CA certificate.
# Server Side
echo "<ca>" >> client.ovpn
sudo cat ca.crt >> client.ovpn
echo "</ca>" >> client.ovpn
For the client certificate.
# Server Side
echo "<cert>" >> client.ovpn
sudo cat client.crt >> client.ovpn
echo "</cert>" >> client.ovpn
For the client key.
# Server Side
echo "<key>" >> client.ovpn
sudo cat client.key >> client.ovpn
echo "</key>" >> client.ovpn
For the TLS key. Note that this also requires an additional directive to set the key direction.
# Server Side
echo "key-direction 1" >> client.ovpn
echo "<tls-auth>" >> client.ovpn
sudo cat ta.key >> client.ovpn
echo "</tls-auth>" >> client.ovpn
Client Setup
Connecting
Here I’m assuming your client is also a Linux based system running Network Manager, but there some alternatives mentioned at the end of this section.
With terminal access on the client machine, securely copy client.ovpn to your client device. I’d recommend using scp to copy the file, replacing “user” for your user name on the sever and your server’s public IP for “serverIP”.
# Client Side
scp user@serverIP:client/client.ovpn .
Or if you are using a .pem file to ssh into your server.
# Client Side
scp -i "my.pem" user@serverIP:client/client.ovpn .
We need to install a plugin for Network Manager to parse .ovpn files. Then we can go ahead and create the connection from the file.
# Client Side
sudo apt-get install network-manager-openvpn
sudo nmcli con import type openvpn file client.ovpn
To establish the VPN connection you can use the following command or the option in the task bar if you’re running a desktop install.
# Client Side
sudo nmcli con up client
If you run ifconfig to check the connection.
# Client Side
ifconfig
You should now get a tun0 interface with an IP address on the VPN’s subnet. Here I’ve been assigned 10.8.0.6 from the server’s DHCP pool. If you want to use static addressing there is a section on that later on in this guide.
tun0: flags=4305<UP,POINTOPOINT,RUNNING,NOARP,MULTICAST>  mtu 1500
        inet 10.8.0.6  netmask 255.255.255.255  destination 10.8.0.5
        inet6 fe80::102:9f11:48dc:6e6  prefixlen 64  scopeid 0x20<link>
        unspec 00-00-00-00-00-00-00-00-00-00-00-00-00-00-00-00  txqueuelen 100  (UNSPEC)
        RX packets 2475  bytes 1889714 (1.8 MB)
        RX errors 0  dropped 0  overruns 0  frame 0
        TX packets 1859  bytes 389718 (389.7 KB)
        TX errors 0  dropped 0 overruns 0  carrier 0  collisions 0
You can also Google “Whats my ip” and see that your public facing IP address is now that of your VPN server (figure 5).

Client Side Network Manager Options
There are some additional useful options if you want your VPN connection to be more resilient.
Before we start these additional steps we need some information about our connections.
# Client Side
sudo nmcli c s
Here you can see my client VPN connection and my WiFi internet connection, Pancakes, along with their UUIDs.
NAME                UUID                                  TYPE      DEVICE
client              524b5ed7-4a84-4f04-80f0-4a504c0bf3df  vpn       wlp2s0
Pancakes            27b14e1b-6655-4c1d-b3cc-24d0a626cebc  wifi      wlp2s0
tun0                c632464b-1541-4240-b5f3-8d140e71aacc  tun       tun0
docker0             6d077358-3032-49e5-8de6-f8db3067b198  bridge    docker0
We can add a couple of commands to make our VPN connection persistent and always retry and connect if it drops. You may need to replace client with your VPN connections name.
# Client Side
nmcli c m client vpn.persistent yes
nmcli c m client connection.autoconnect-retries 0
You may also want your VPN connection to be connected automatically after establishing your internet connection. You can do this as follows, replacing “connection” for your internet connection’s name and “your-vpn-uuid” for the UUID of your VPN connection, which was returned a couple of steps ago.
# Client Side
nmcli c m connection connection.secondaries your-vpn-uuid
Here’s what the above command looks like for my example case.
# Client Side
nmcli c m Pancakes connection.secondaries 524b5ed7-4a84-4f04-80f0-4a504c0bf3df
There is also an additional step you can take to help keep your VPN connection up. You can create a script to run whenever Network Manager sees a change in connections. Let’s create the file for the script and make it executable.
# Client Side
sudo touch /etc/NetworkManager/dispatcher.d/auto_reconnect.sh
sudo chmod +x /etc/NetworkManager/dispatcher.d/auto_reconnect.sh
sudo nano /etc/NetworkManager/dispatcher.d/auto_reconnect.sh
The script below will bring up the VPN if it is ever found to be down. This particular script will only work if you have one VPN connection stored within Network Manager and it needs the name of your internet providing connection to be set as the “REQUIRED_CONNECTION_NAME”, for me this was Pancakes.
#! /bin/bash
vpn=$(nmcli c s | grep vpn)
IFS=' '; vpn_conn_details=($vpn); unset IFS;

REQUIRED_CONNECTION_NAME="Pancakes"
VPN_CONNECTION_NAME="${vpn_conn_details[$1]}"

activ_con=$(nmcli c s --active | grep "${REQUIRED_CONNECTION_NAME}")
activ_vpn=$(nmcli c s --active | grep "${VPN_CONNECTION_NAME}")

if [ "${activ_con}" -a ! "${activ_vpn}" ];
then
    echo "VPN not connected"
    echo "Bringing up VPN"
    nmcli con up id "${VPN_CONNECTION_NAME}"
else
    echo "VPN already connected"
fi
Exit and save with Ctrl+x followed by y and hit enter.
Alternatives
On Windows there is a client program.
On iOS there is a client app.
Once you have either of these clients installed you can add a new connection with “+” > “Import From File” > client.ovpn.
I’ll let you figure out how to scp the .ovpn file over as this will be dependent on your setup (Google is your friend).
Assigning Clients a Static IP
DHCP IP assignment may be fine for some use cases, but in robotics it is useful to assign a specific IP address to each robot asset that will connect to the network. This helps with facilitating robot to robot communication as well as allowing engineers or users know which robot they are connecting to.
We can configure this quite easily in OpenVPN, by setting up a client configuration directory and then creating entries for each client, both in that directory and the ipp.txt log file.
Let’s start by editing the server configuration.
# Server Side
cd /etc/openvpn
sudo nano server.conf
Uncomment out and edit these lines:
client-config-dir /etc/openvpn/ccd
route 10.9.0.0 255.255.255.252
topology subnet
Such that this part of your server.conf file looks like this.
# EXAMPLE: Suppose you want to give
# Thelonious a fixed VPN IP address of 10.9.0.1.
# First uncomment out these lines:
client-config-dir ccd
route 10.8.0.0 255.255.255.0
# Then add this line to ccd/Thelonious:
#   ifconfig-push 10.9.0.1 10.9.0.2
Now we need to create the client configuration directory and set the permissions such that the OpenVPN program can access it.
# Server Side
sudo mkdir /etc/openvpn/ccd
sudo chown -R nobody:nogroup /etc/openvpn/ccd
Next create a configuration for our one and only client, “client”. Let’s create and edit a configuration file, note that the file name is the name of the client without any file extension.
# Server Side
cd /etc/openvpn/ccd
sudo touch client
sudo nano client
Inside this file we can add various directives to push network settings to the client, such as DNS etc. Here we’ll just push the IP address and subnet mask.
ifconfig-push 10.8.0.10 255.255.255.0Exit and save with Ctrl+x followed by y and hit enter.
We should also reserve the IP address for this user so that it isn’t available in the DHCP pool. To do this first stop the VPN service.
# Server Side
sudo service openvpn stop
Then edit the ipp.txt file.
# Server Side
sudo nano /var/log/openvpn/ipp.txt
Adding an entry for our client, with the client name and IP address, separated by a comma.
client,10.8.0.10Exit and save with Ctrl+x followed by y and hit enter.
Restart the VPN service to have the changes take effect.
# Server Side
sudo service openvpn start
Now when you connect with the client and check ifconfig you should see that the client’s IP address is the same as the one designated in the client configuration above.
# Client Side
ifconfig
# Client Side
tun0: flags=4305<UP,POINTOPOINT,RUNNING,NOARP,MULTICAST> mtu 1500
inet 10.8.0.10 netmask 255.255.255.0 destination 10.8.0.10
inet6 fe80::9b33:a023:419:f1d4 prefixlen 64 scopeid 0x20<link>
unspec 00-00-00-00-00-00-00-00-00-00-00-00-00-00-00-00 txqueuelen 100 (UNSPEC)
RX packets 18 bytes 1676 (1.6 KB)
RX errors 0 dropped 0 overruns 0 frame 0
TX packets 22 bytes 3348 (3.3 KB)
TX errors 0 dropped 0 overruns 0 carrier 0 collisions 0On the server side you can also check the client connection and assigned IP address in the status log while the client is connected.
# Server Side
sudo watch cat /var/log/openvpn/openvpn-status.log
OpenVPN CLIENT LIST
Updated,Sun Mar 13 10:43:03 2022
Common Name,Real Address,Bytes Received,Bytes Sent,Connected Since
client,51.7.55.141:43990,12014614,79526755,Sun Mar 13 09:54:43 2022
ROUTING TABLE
Virtual Address,Common Name,Real Address,Last Ref
10.8.0.10,client,51.7.55.141:43990,Sun Mar 13 10:42:53 2022
GLOBAL STATS
Max bcast/mcast queue length,1
ENDServer Maintenance Operations
Once your server is up and running the majority of the work will consist of provisioning new clients, revoking access for old ones and checking connections.
Useful Commands
I have shown this earlier in this post but I’ll repeat it again here. The following command will allow you to monitor the active connections to the server and the time of their most recent activity.
# Server Side
sudo watch cat /var/log/openvpn/openvpn-status.log
This command will show you reserved IP addresses and which clients they are reserved for.
# Server Side
sudo cat /var/log/openvpn/ipp.txt
If we need more details we can inspect the detailed log. Note that the verbosity of this logging can be set in /etc/openvpn/server.conf.
# Server Side
sudo cat /var/log/openvpn/openvpn.log
You may also need to enable logging to this file uncommenting either of these directives in /etc/openvpn/server.conf.
# By default, log messages will go to the syslog (or
# on Windows, if running as a service, they will go to
# the "\Program Files\OpenVPN\log" directory).
# Use log or log-append to override this default.
# "log" will truncate the log file on OpenVPN startup,
# while "log-append" will append to it.  Use one
# or the other (but not both).
;log         /var/log/openvpn/openvpn.log
log-append  /var/log/openvpn/openvpn.log
Issuing Additional Clients the Easy Way
Below is a bash script that can be run on the server to carry out the steps listed above, generating the .ovpn file and issuing a static IP address for the client.
#! /bin/bash

sudo systemctl stop openvpn

client="client_102" # UNIQUE_CLIENT_SHORT_NAME and UNIQUE_SHORT_FILE_NAME
ip="10.8.0.102" # Static IP address as set in the ccd directory

cd /etc/openvpn/easy-rsa

#sudo ./easyrsa gen-req UNIQUE_CLIENT_SHORT_NAME nopass
sudo ./easyrsa gen-req "$client" nopass
#sudo ./easyrsa sign-req client UNIQUE_SHORT_FILE_NAME
sudo ./easyrsa sign-req client "$client"


echo "Attempting to verify $client certificate"
sudo openssl verify -CAfile pki/ca.crt pki/issued/"$client".crt


sudo cp /etc/openvpn/easy-rsa/pki/ca.crt /etc/openvpn/client/.
sudo cp /etc/openvpn/easy-rsa/pki/issued/"$client".crt /etc/openvpn/client/.
sudo cp /etc/openvpn/easy-rsa/pki/private/"$client".key /etc/openvpn/client/.


mkdir /home/ubuntu/vpn_credentials/"$client"

sudo cp /etc/openvpn/easy-rsa/pki/ca.crt /home/ubuntu/vpn_credentials/"$client"/.
sudo cp /etc/openvpn/easy-rsa/pki/issued/"$client".crt /home/ubuntu/vpn_credentials/"$client"/.
sudo cp /etc/openvpn/easy-rsa/pki/private/"$client".key /home/ubuntu/vpn_credentials/"$client"/.
sudo cp /etc/openvpn/ta.key /home/ubuntu/vpn_credentials/"$client"/.

cp /home/ubuntu/vpn_credentials/template.ovpn /home/ubuntu/vpn_credentials/"$client"/"$client".ovpn

echo "Compiling unified .ovpn file"
echo "<ca>" >> /home/ubuntu/vpn_credentials/"$client"/"$client".ovpn
cat /home/ubuntu/vpn_credentials/"$client"/ca.crt >> /home/ubuntu/vpn_credentials/"$client"/"$client".ovpn
echo "</ca>" >> /home/ubuntu/vpn_credentials/"$client"/"$client".ovpn

echo "<cert>" >> /home/ubuntu/vpn_credentials/"$client"/"$client".ovpn
cat /home/ubuntu/vpn_credentials/"$client"/"$client".crt >> /home/ubuntu/vpn_credentials/"$client"/"$client".ovpn
echo "</cert>" >> /home/ubuntu/vpn_credentials/"$client"/"$client".ovpn

echo "<key>" >> /home/ubuntu/vpn_credentials/"$client"/"$client".ovpn
cat /home/ubuntu/vpn_credentials/"$client"/"$client".key >> /home/ubuntu/vpn_credentials/"$client"/"$client".ovpn
echo "</key>" >> /home/ubuntu/vpn_credentials/"$client"/"$client".ovpn

echo "key-direction 1" >> /home/ubuntu/vpn_credentials/"$client"/"$client".ovpn

echo "<tls-auth>" >> /home/ubuntu/vpn_credentials/"$client"/"$client".ovpn
cat /home/ubuntu/vpn_credentials/"$client"/ta.key >> /home/ubuntu/vpn_credentials/"$client"/"$client".ovpn
echo "</tls-auth>" >> /home/ubuntu/vpn_credentials/"$client"/"$client".ovpn

echo "Setting static IP"
echo "ifconfig-push ""$ip"" 255.255.255.0" > /etc/openvpn/ccd/"$client"
# echo 'push "topology subnet"' > /etc/openvpn/ccd/"$client"
echo "$client","$ip" >> /var/log/openvpn/ipp.txt

sudo systemctl start openvpn

echo "Complete"
When prompted type yes and hit enter.
It shouldn’t take a lot of additional work to make the bash script provided here work for provisioning a whole batch of clients, just setting some relationship between client name and IP address or reading names and IP addresses from a file, then looping over them running the script provided here for each instance.
Revoking a Client
Should a client’s connection credentials become compromised or a client need to be retired for any other reason, this will show you how to do that. First go to the Easy RSA directory and revoke the client, swapping client_name for the client’s name which is to be revoked.
# Server Side
cd /etc/openvpn/easy-rsa
sudo ./easyrsa revoke client_name
Then generate a CRL file.
# Server Side
sudo ./easyrsa gen-crl
Copy the CRL file to where the OpenVPN software can access it.
# Server Side
sudo cp pki/crl.pem /etc/openvpn/server/
Finally, if this is the first time revoking a client you will need to edit your server.conf to point it towards your CRL file. However in future you can just update the old CRL file for the newly generated one.
# Server Side
sudo nano /etc/openvpn/server.conf
Add the following new line somewhere near the top of the file.
crl-verify server/crl.pemExit and save with Ctrl+x followed by y and hit enter.
Resources and Further Reading
Hak5 - Linux Server Build: OpenVPN From Scratch
Digital Ocean - How To Set Up and Configure an OpenVPN Server on Ubuntu 20.04
Hey you!
Found this useful or interesting?
Consider donating to support.
Any question, comments, corrections or suggestions?
Reach out on the social links below through the buttons.